Your Cart is Empty
For the passionate coffee aficionado, nothing beats starting your day with a perfect cup of the brew.
In Australia, where coffee culture thrives, this sentiment rings particularly true.
Yet, to achieve that cup of java nirvana, you must first understand the wide range of brewing methods available.
Each technique provides a distinct flavor profile and overall experience.
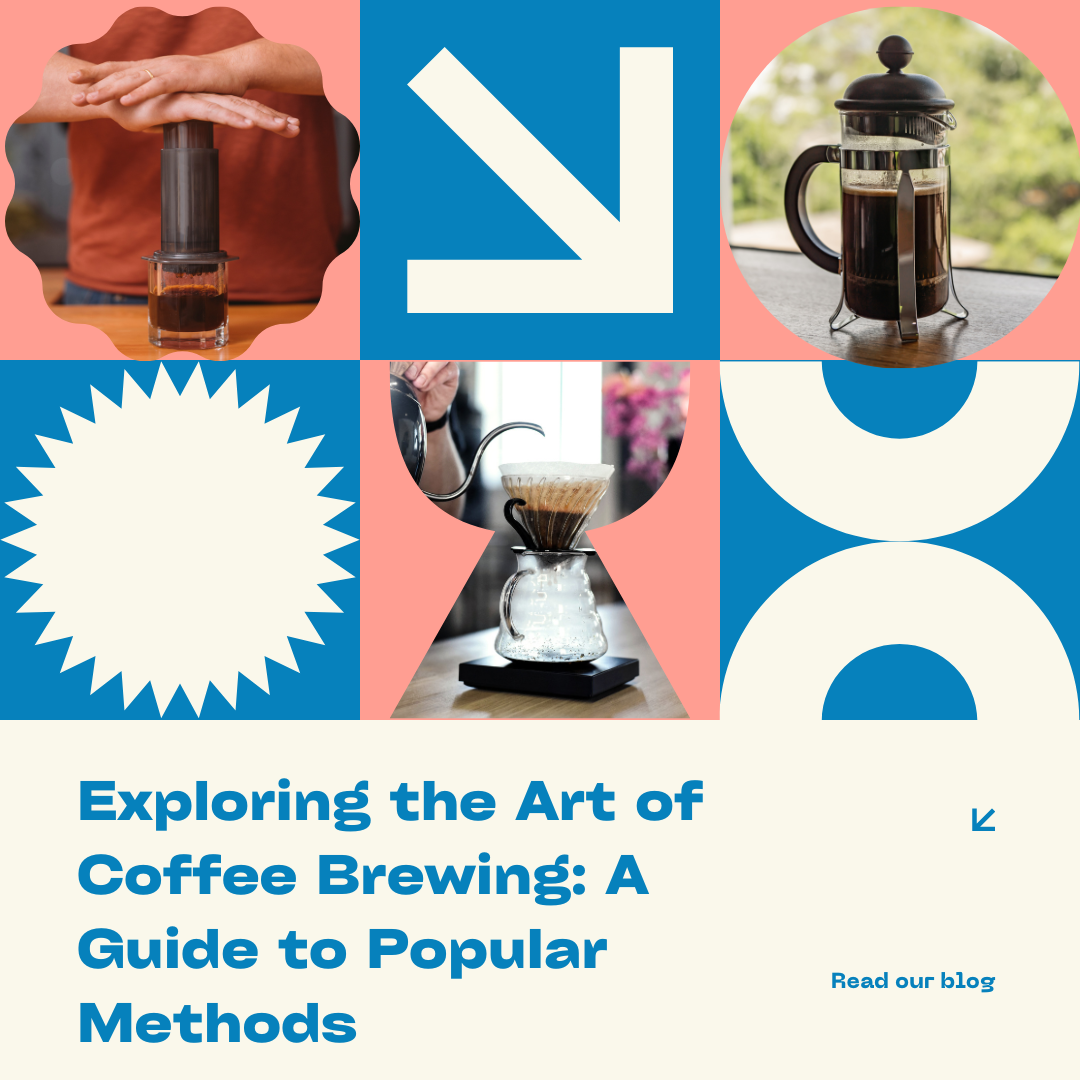
So, whether you’re a seasoned connoisseur or just a coffee-curious individual, this comprehensive guide aims to shed light on popular coffee brewing methods like French press, pour-over, and many more.
By the end, you should feel confident about experimenting with these methods to create your perfect cup of coffee at home.

Ironically, the French Press method, despite its name, originated from Italy and is cherished globally for its simplicity, elegance, and ability to produce rich, full-bodied coffee.
This classic brewing method, also known as a press pot or plunger pot, is distinguished by its manual immersion brewing process.
It truly allows the coffee grounds and hot water to interact, extracting the coffee's natural oils and flavours.
The French Press consists of a cylindrical carafe, typically made of glass or stainless steel, and a plunger with a mesh metal filter. Its operation is straightforward but yields coffee with complex and robust flavours.
To brew coffee with a French Press, here are the detailed steps:
Measure your coffee: The ideal ratio is one tablespoon of coffee for every 4 ounces (about 120 ml) of water. The coffee should be coarsely ground to prevent it from passing through the mesh filter.
Add the coffee grounds into the carafe: This is the bottom part of your French Press.
Boil your water: The water should be heated to about 200°F or 93°C. If you don't have a thermometer, bring the water to a boil and then let it sit for a minute before pouring it onto your coffee.
Pour your hot water into the carafe: Make sure all the coffee grounds are saturated. You might want to stir with a wooden or plastic spoon (metal can crack the glass) to ensure all the grounds are fully immersed.
Let it steep: Cover the carafe with the plunger part but do not push it down yet. Allow the coffee to steep for about 4 minutes. This will extract the perfect amount of flavour from the grounds.
Press down the plunger: Apply gentle pressure to push the plunger downwards, which will separate the grounds from the brewed coffee.
Serve immediately: To prevent over-extraction and bitterness, pour the coffee into your cups as soon as the brewing process is complete.
This charming brewing method might require a bit more patience than others, but the reward is a highly flavourful, aromatic, and full-bodied coffee that reflects the true essence of the beans.
Enjoy the ritual of French Press brewing and the nuanced cup it produces.
Shop 25% off our best selling Tasting Packs Here

Germany's gift to the coffee world, the pour-over method, has won the hearts of coffee enthusiasts globally, and Australia is no exception.
This method champions precision, control, and the appreciation of coffee as an art form. The result is a clean, bright cup that allows the intricate flavours of the coffee to shine through.
The pour-over process involves pouring hot water over a filter filled with coffee grounds and letting the brew drip into a carafe or cup.
To start, you'll need a few key tools: medium-fine coffee grounds, a pour-over dripper (like a Hario V60 or Chemex), a filter, a kettle, and a scale for precise measurements.
Here's a more detailed walkthrough:
Pre-wet the filter: Place your filter in the dripper and rinse it with hot water. This step helps remove any paper taste from the filter and preheats your brewing equipment. Remember to discard the rinse water.
Measure and grind your coffee: A good ratio to start with is 1 gram of coffee for every 15-18 grams of water. The coffee should be ground to a medium-fine consistency, similar to table salt.
Add coffee to the filter: Make a small well in the center of the grounds to facilitate even extraction.
Bloom the coffee: Pour just enough hot water (around 200°F or 93°C) to saturate the grounds and let them 'bloom' for about 30 seconds. This step allows the coffee to release any trapped gases, leading to better extraction.
Start the pour: Gradually add more water in a slow, circular motion, starting from the middle. Avoid pouring directly on the filter.
Wait and enjoy: Allow all the water to pass through the coffee grounds, then carefully remove the dripper. Now, it's time to savour your brew!
The pour-over method requires patience and practice, but the reward is a complex, flavourful cup that truly reflects the essence of your coffee beans.
This brewing technique will no doubt elevate your coffee experience, allowing you to appreciate the nuanced tastes and aromas that each coffee bean possesses.

The AeroPress, though a relative newcomer to the coffee brewing scene, has quickly become a favourite among both coffee professionals and enthusiasts worldwide.
Invented by Alan Adler in 2005, the AeroPress has been praised for its simplicity, speed, and ability to brew an exceptionally smooth cup of coffee.
Operating under a principle somewhat similar to an espresso machine, the AeroPress uses air pressure to force water through the coffee grounds.
However, unlike an espresso machine that requires specialized training and expensive equipment, the AeroPress is compact, inexpensive, and relatively easy to use.
To brew coffee with an AeroPress, you will need finely ground coffee, similar in consistency to table salt.
You'll also need hot (but not boiling) water, an AeroPress with its accompanying paper or metal filter, and a stirrer. Here's how to proceed:
Insert a filter into the cap of the AeroPress and rinse it with hot water. This step helps to get rid of any papery taste if you're using a paper filter.
Add coffee into the chamber. A general guideline to follow is one heaped AeroPress scoop (about 17 grams) for every 8 ounces of water.
Pour a small amount of your hot water (about 200°F or 93°C) into the chamber, just enough to saturate the coffee grounds. Let it "bloom" for about 30 seconds. Blooming allows the coffee to release trapped gases, leading to better extraction.
Stir the mixture and then pour in the rest of your water. Attach the cap, ensuring the filter is in place.
Wait for about a minute for the coffee to steep.
Finally, hold your AeroPress over your mug and apply steady downward pressure to the plunger. You'll be rewarded with a full-bodied, smooth cup of coffee in less time than it would take to brew a pot of drip coffee.
Experiment with brewing times and coffee-to-water ratios to find the flavor profile that suits your tastes best.
One of the charms of the AeroPress is its versatility in this regard. Whether you prefer a bold, rich cup or a lighter, more nuanced brew, the AeroPress can deliver.

The cold brew method, while sounding rather straightforward, is a unique and meticulous brewing process that coffee lovers across the globe have come to appreciate.
Despite the simplicity of its name, cold brew coffee isn't merely coffee that has been cooled down. Instead, it refers to a specific brewing process where coffee grounds are steeped in cold water over a prolonged period.
Cold brewing is an infusion method that uses time instead of heat to extract the oils, sugars, and caffeine from the coffee beans.
The result is a smooth, robust coffee concentrate that is much less acidic and bitter than hot brewed coffee. These lower acid levels make cold brew a great choice for those with sensitive stomachs.
Plus, the prolonged steeping process extracts a different flavour profile from the beans, often resulting in a sweeter and more nuanced taste.
To make cold brew coffee, you will need coarse ground coffee, cold water, a large jar or jug, and a sieve or coffee filter. Here are the steps:
Combine coffee and water in your container at a ratio of about 1:8. That's one part coffee for every eight parts water.
Stir the mixture to ensure all the coffee grounds are thoroughly saturated.
Cover the container and let it steep. This process should take anywhere from 12 to 24 hours, depending on how strong you want your brew to be. The steeping should take place at room temperature or in the refrigerator.
After steeping, strain the mixture using a sieve lined with a coffee filter. This process separates the grounds from your delicious cold brew concentrate.
To serve, dilute the concentrate with water or milk. The ratio is usually 1:1 but can be adjusted to taste. You can enjoy your cold brew coffee cold over ice or heated for a warm cup.
Remember, the cold brew method can be experimented with by changing your coffee-to-water ratios, steeping times, and choice of coffee beans.
This allows you to customise your brew to your exact liking, discovering a world of flavours along the way.

When we think of traditional Italian coffee, it's hard not to picture the iconic espresso.
It's more than a coffee; it's a culture, a morning ritual, and a gift from Italy to the rest of the world.
The espresso brewing method uses pressure to force hot water through finely-ground coffee beans.
The result is a highly concentrated, rich and full-bodied brew, with a delightful layer of crema on top.
This crema is a surefire sign of a well-extracted espresso, signifying a harmonious balance of temperature, pressure, and coffee ground fineness.
Espresso forms the foundation for many beloved coffee drinks, such as lattes, cappuccinos, and mochas, to name a few.
Despite its complex flavour, brewing espresso is fairly simple, albeit requiring some specialized equipment. Here's a more detailed breakdown of the process:
Choose your beans: Espresso is traditionally made with a darker roast, but the choice is up to personal preference. Regardless of the roast, the beans must be ground just before brewing to retain their flavor. Aim for a fine to super-fine grind, almost powdery in texture.
Tamp your grounds: Fill your portafilter (the small handled basket that holds the coffee) with the freshly ground coffee and then press down with a tamp to compact the coffee grounds. The goal is to create a smooth and level surface. This tamping process ensures even extraction of the coffee.
Brew: Attach the portafilter to your espresso machine and start the brewing process. Water should be heated to about 200°F or 93°C, and the ideal brewing time is between 20-30 seconds. If it's too quick, the coffee will be under-extracted and weak; if it's too slow, the coffee will be over-extracted and bitter.
Enjoy: A well-brewed shot of espresso should yield about 30-40ml of liquid, topped with a layer of creamy, golden crema. Savour it as is, or use it as a base for other coffee beverages.
Remember, as with any coffee brewing method, the key to great espresso lies in the quality of the beans and the precision of your method.
Don't be disheartened if your first few attempts aren't perfect; with practice, you'll soon be pulling shots like a professional barista.

The Moka Pot, often referred to as the stovetop espresso maker, is a beloved kitchen gadget that has been gracing households since its creation in 1933 by Italian engineer Alfonso Bialetti.
This classic piece of coffee equipment is recognized worldwide for its iconic octagonal design and its ability to produce a strong, rich brew that's akin to espresso.
It operates on the principle of passing boiling water, pressurized by steam, through coffee grounds.
To understand how to best use a Moka Pot, it's useful to know its three main components. The bottom chamber, also known as the boiler, holds water.
The middle part is a perforated coffee basket that holds the grounds, and the top chamber collects the brewed coffee.
Here's a step-by-step guide to brewing coffee with a Moka Pot:
Fill the bottom chamber with cold water up to the valve or a bit below.
Fill the coffee basket with your ground coffee. A medium-fine grind works well here. Ensure the coffee is evenly spread and level, but do not tamp the grounds as this could lead to over-extraction.
Place the coffee basket into the bottom chamber, then screw the top and bottom chambers together.
Place the Moka Pot on your stovetop and heat it over medium heat. The pressure from the heat will force the water up through the coffee grounds and into the top chamber.
When you hear a gurgling sound, that's a sign your coffee is ready. Remove it from the heat to prevent over-extraction or burning.
Pour the coffee directly into your cup, and enjoy!
The Moka Pot is an effective and affordable way to make a strong, espresso-like coffee at home.
As with any brewing method, the quality of your beans and the accuracy of your process will significantly impact the final taste. Experiment with different coffee types, grind sizes, and heat levels to find the method that produces your perfect brew.
Conclusion
Choosing a brewing method will ultimately come down to your personal coffee preferences in flavour and body, your willingness to purchase the required equipment, and the amount of time you're willing to devote to brewing coffee.
By familiarising yourself with these popular brewing methods, you can start to explore the vast and exciting world of coffee in your kitchen, discovering new flavours, refining your techniques, and ultimately achieving the perfect cup of coffee that suits your taste. So here's to your brewing adventures!
Shop 25% off our best selling Tasting Packs Here
Comments will be approved before showing up.
